FEBRUARY’S TIP OF THE MONTH
What is White balance?
Click on image to enlarge.
What is white balance?
White balance is a camera setting that establishes the true color of white. This produces a baseline from which all other colors are measured. White may not appear “white” under all lighting conditions, so this helps correct it. White balance can be automatically determined by the camera, chosen from a list of presets, or manually set by the user.
What Does White Balance Do:
- Applies to still photography and videography
- Defines “white” and adjusts all other colors accordingly
- Improper balance leads to a yellowish or blueish image
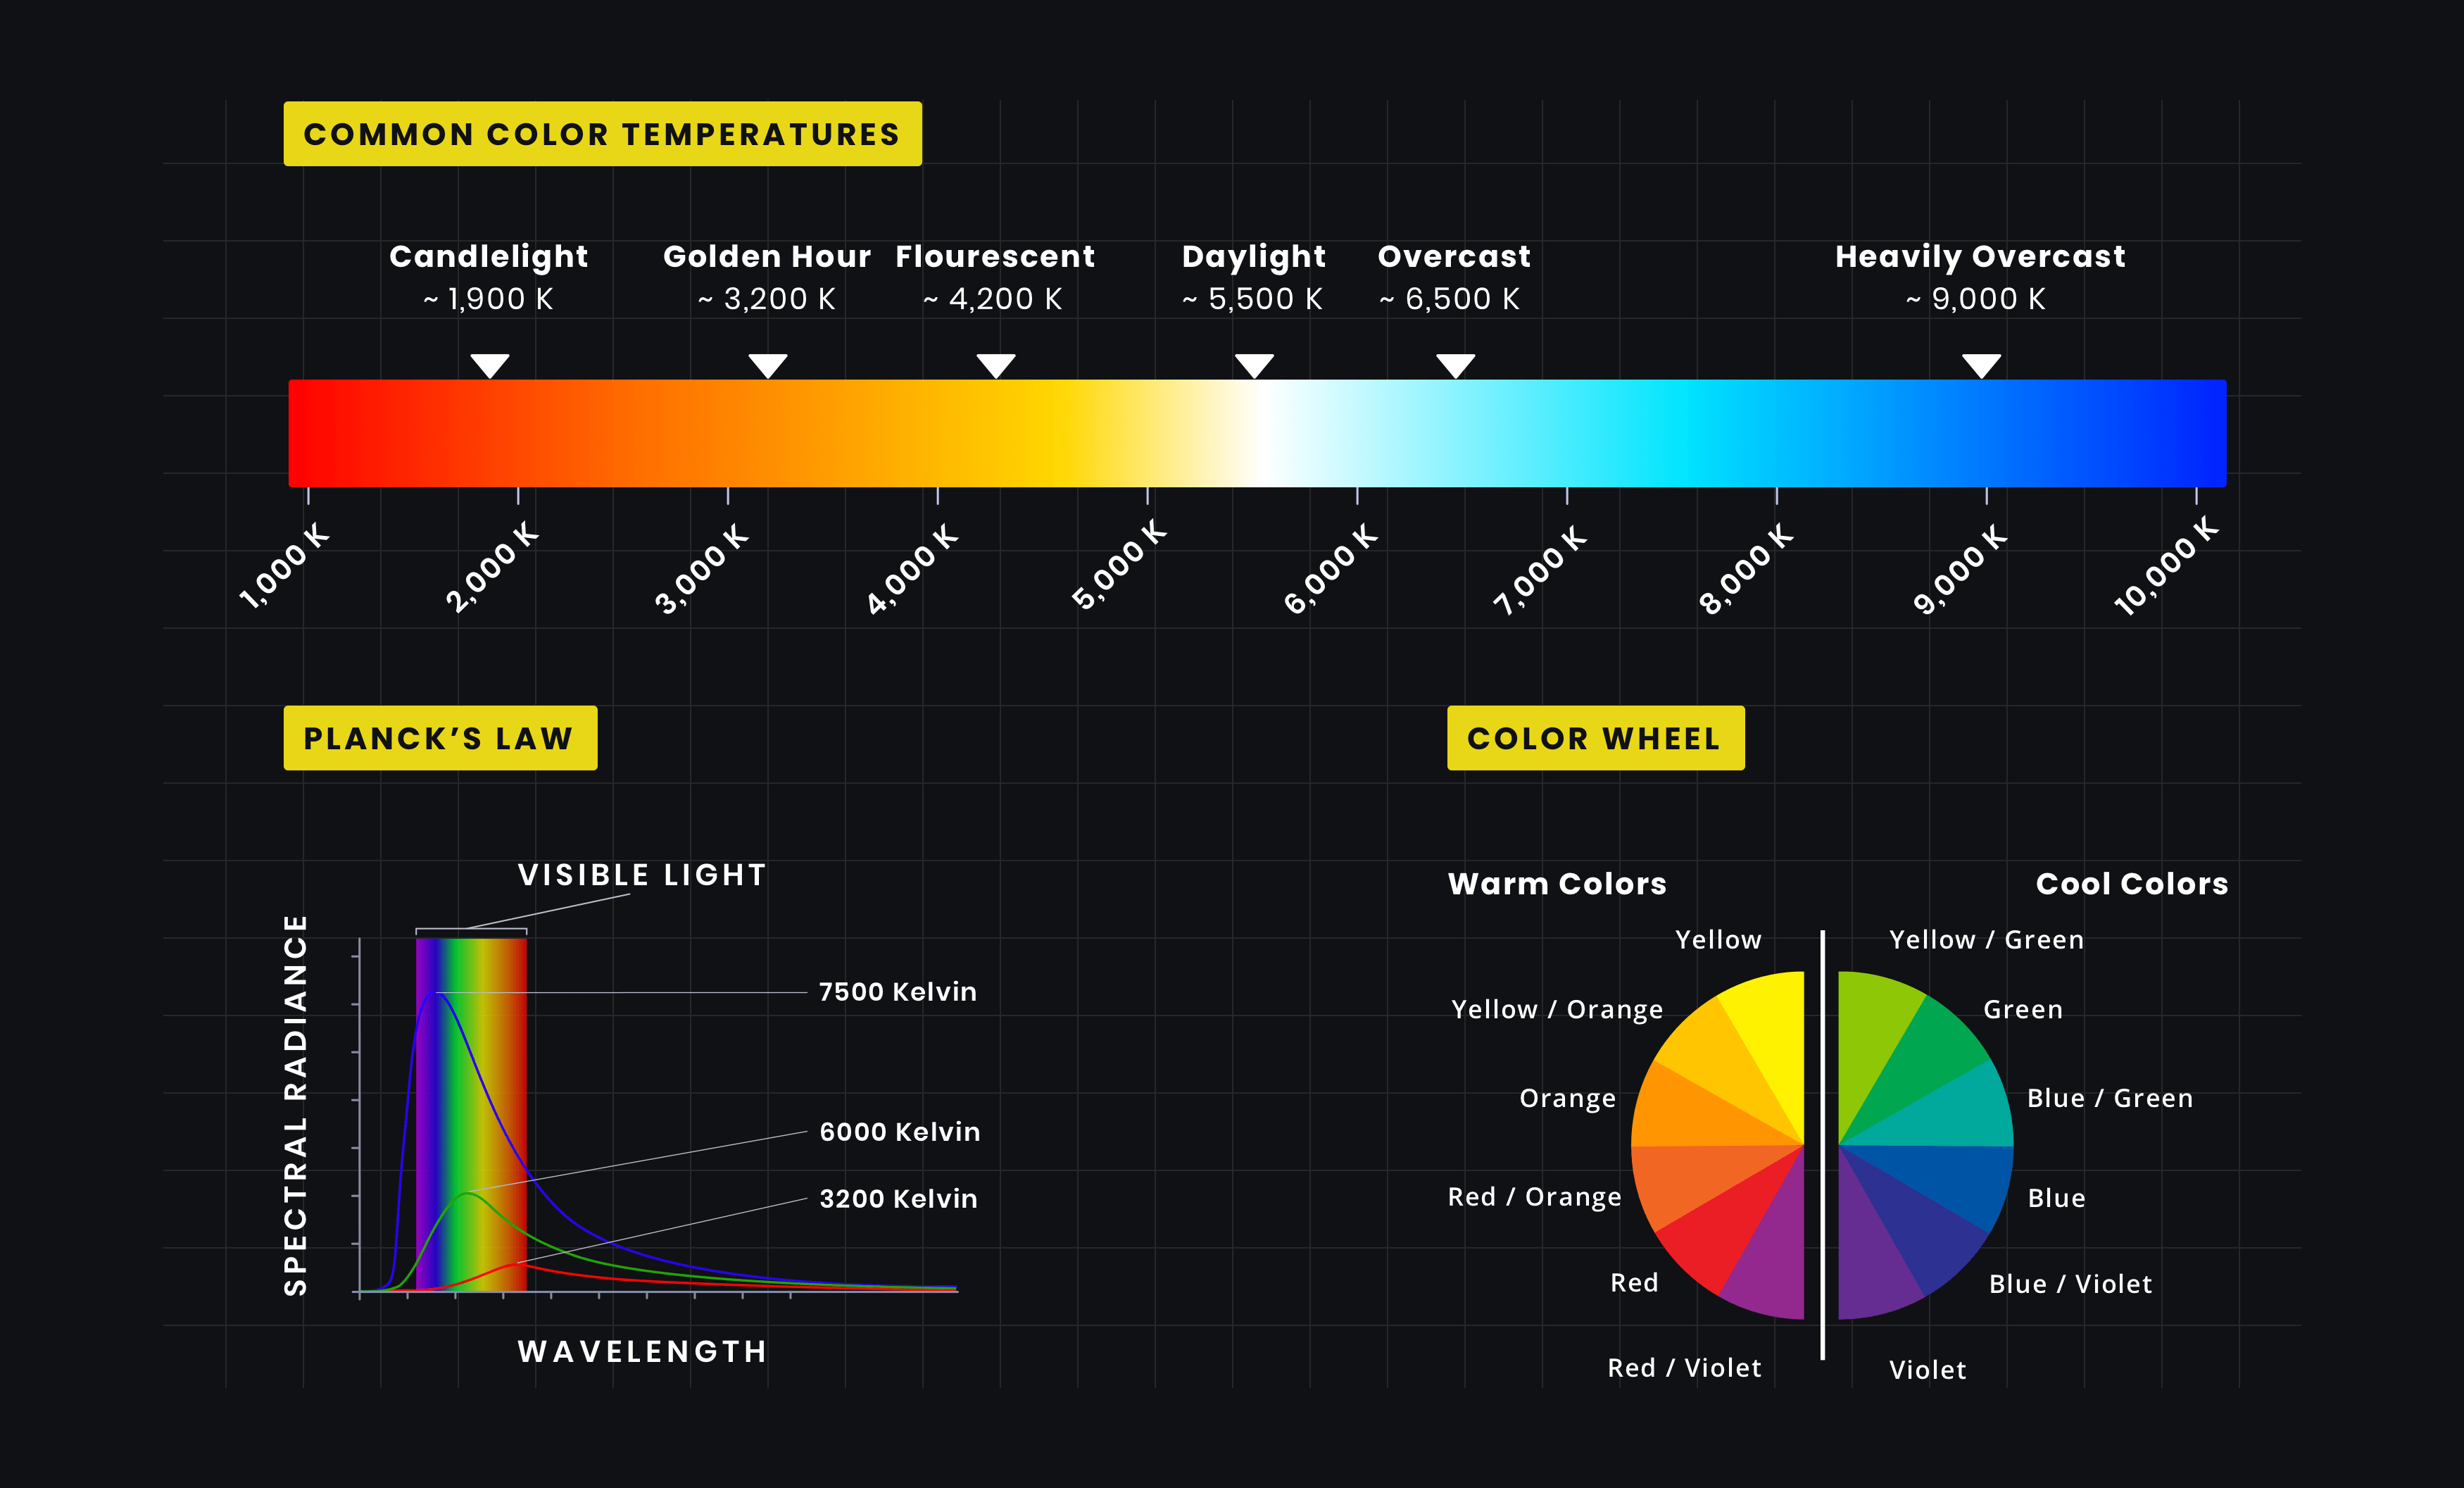
Understanding color temperature
The reason why setting white balance is necessary comes down to the color of the light upon the subject, also called the colour temperature. Whether dealing with natural light outdoors or man-made lighting fixtures indoors, light can come in a wide variety of intensities, values, and temperatures.
What is Color Temperature •
These varying color temperatures will affect the look of your image unless you properly white balance. Be aware that it is possible to improperly white balance a camera as well. Color temperature is a spectrum, so minute adjustments may be necessary to fine-tune your image.

The spectrum of color temperature • camera white balance
And your white balance may need to be adjusted throughout a shoot if you are shooting outdoors and the temperature of the light changes throughout the day. It is a variable that requires monitoring, not a “set it and forget it” type of camera setting.
WHITE BALANCE SETTINGS
How to calibrate white balance
There are three ways to calibrate this balance of most cameras, though some cameras may only offer one option: Auto, presets, and manual.
Auto balance can sometimes be accurate but, just like with most settings, you will find greater results if you calibrate by hand.
Nestled between auto and manual balance options are a range of presets. Many digital cameras come with a standard array of presets designed to white balance the image under predetermined lighting conditions.
A typical DSLR camera for example is likely to have white balance settings for sunny weather, cloudy weather, fluorescent light, tungsten light, etc.
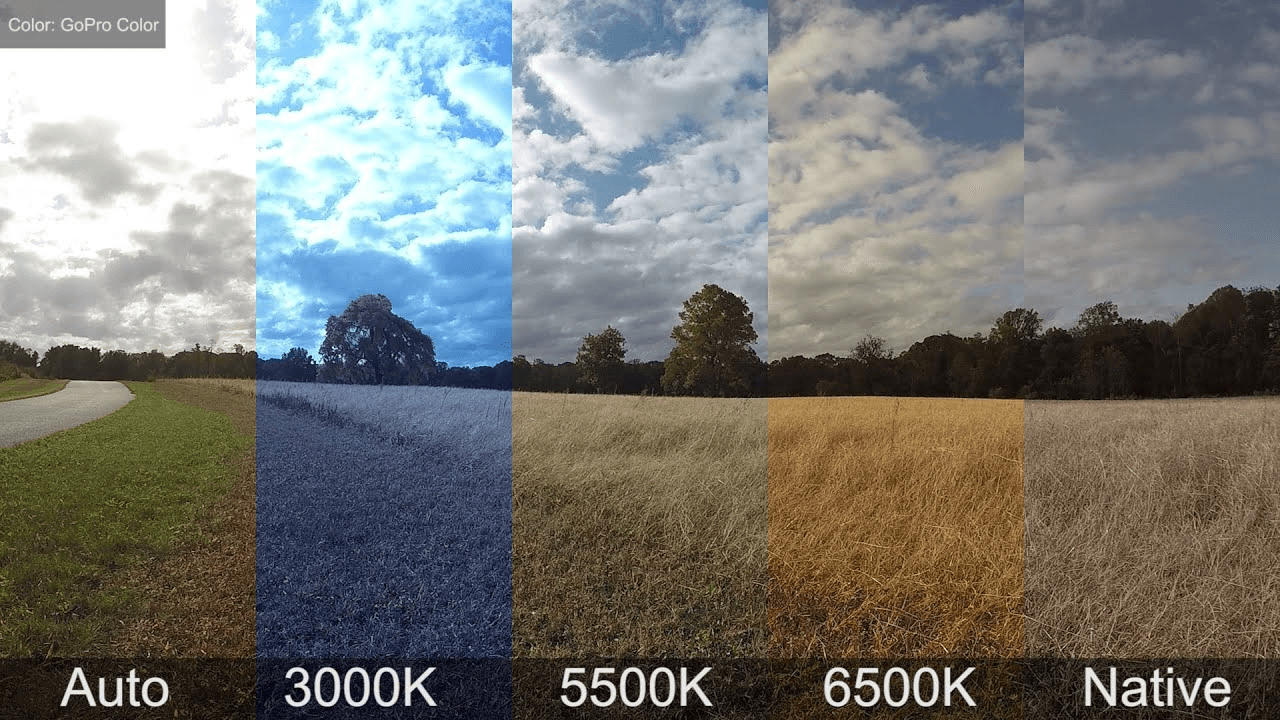
The following shows a single image divided into sections by different balance settings. This example image below is the same principle used in all digital cameras.

Kelvin temperatures compared
Manual white balance can be done in two ways. The first is by manually inputting a Kelvin number. The lower the Kelvin count, the cooler the image, and of course the inverse is true as well. The kelvin range gives you a great deal of wiggle room to help you find the color temperature that looks the most natural on screen.
The second manual option will deliver the most accurate results of all. You can use a grey card or white card (or any true white object available) to set a custom balance. By doing this, you are manually telling the camera exactly what true white looks like in the current lighting, and the camera will calibrate all other colors accordingly.
For Nikon users:
- Inside your camera’s menu find White Balance on the shooting menu options.
- Scroll down until you see PRE setting (below) and highlight that. It stands for Preset and is Nikon’s terminology for custom white balance.

- Hold down your WB (white balance) button for a few seconds until your LED display is flashing. Alternately if your model doesn’t do that, find the PRE setting in your menu and press your toggle to the right, choose “Measure” and set for Okay.
- Take a photo of the gray card (follow the directions for that above).
- You’re done, it should now be set.
That’s the short version of how to do it. If your camera doesn’t have those settings refer to your manual or do a quick YouTube search for the words “custom white balance” plus the name and model number of your camera. There is probably a video showing how to do it with your camera step by step. There are so many variations and cameras we can’t show them all here unfortunately.
How to use a gray card for metering
Your camera has a built-in meter that reads the amount of light and sets the exposure (or gives you information so you can do it if you’re shooting in manual mode). But sometimes it gets it wrong such as when you’re shooting a white subject, or a really dark one. That is because your camera is measuring and setting to make everything medium or 18% gray. Read more about how metering works in your camera here: why is the snow grey in my winter photos?
You can use a gray card to help you set the exposure in such situations.
It is ideal to use this technique for portraits using natural light when the lighting remains constant, and circumstances where you have the time to setup your shot, use a tripod, and do a custom white balance as outlined above. It is not the time to use a gray card for metering when you have a moving subject or the light is changing rapidly.

Notice in the photo above the model is holding the gray card in front of her. Get your subject to help you by doing this, or prop it up in your shot somehow. Make sure the gray card is facing the camera straight on, as sometimes the slightest tilt or turn to one side can change how much light is bouncing off of it, and that will affect your exposure reading.
Follow these steps to take your meter reading:
- Set your camera to manual shooting mode. Select the ISO and aperture you wish to use for your shot.
- Set your camera’s metering mode to Spot Metering. This will allow the camera to read a very small area only, helpful if you only have a small gray card. You only want it to read the light off the reflector only, not the entire scene.
- Set your focus point to single and choose the center one. Your camera will meter the same place it focuses.
- Aim your camera at the gray card and press the shutter button part way down to take a reading. Looking in your viewfinder (eye piece) adjust the shutter speed until it gives you a reading of “0” (zero).
- Take a test shot of the model (or subject) and the gray card similar to the one above.
- Review the histogram – you should have a perfect exposure with the gray card and all tones falling in the correct zones. If you shot only the gray card you should see one like below.

Note: if your lighting changes (gets brighter or darker), or you add a reflector or fill-flash you will need to meter and repeat the entire process again.
Come down to our Club Nights every Monday night from 7:30pm to 9:30pm at Roundhill WMC, for a fun pack night, with like minded people with a warm welcome!
Would you like to become a member?
Simply fill out the form below and we will get back to you with more details.


